Tuesday, May 22, 2012

One Yard Wonders - Strapless Bandeau Shorty Jumper

I've been doing tons of sewing lately and almost zero picture-taking and posting.  Custom orders, baby gifts, freezer paper stenciling, zippered pouches for staff appreciation week have all kept me busy.  I just finished the cutest custom order ever but only took a crappy cell phone pic:(

It's a newborn peasant dress with a matching doll wearing the same dress.  How adorable is that?!  I wish I could take credit for the idea but my friend who ordered the set gets all the credit.  I'm thinking about listing a few of these in my shop since I think it's a really nice, unique gift.

After a day of working part-time for my sewing job, shuttling kids, and barely being able to keep my eyes open thanks to allergy meds, I decided I wanted to take on a project.  I looked through my One Yard Wonders book this weekend and realized that in the 18 months or so since I bought it, I haven't made one damn thing even though there are several patterns I want to try.

I decided to make the Strapless Bandeau Shorty Jumper for Matea (pages 194&195).  Let me say this could not have been any easier.  It literally took less than 30 minutes from start to finish and turned out even cuter than the picture, if I do say so myself.

How cute is she?!  She'll be finished with kindergarten in just a few weeks and I've been really sad thinking about her being in first grade and gone all day just like Bella next year.  No more snuggles with mommy in the two hours we have together between her pickup and Bella's.  In some ways, I think sending her off to first grade will be harder than kindergarten. 


 (Namaste)


But back to the jumper...I think even the most beginner of seamstresses could handle this.  I was a little worried about the strapless aspect but I used a nice wide elastic which kept it up well.  She ran around and played outside and didn't flash me once!  I used a vintage sheet from my stash because I wanted something light and summery and I love this aqua color with my girls' Mexican skin tone.

And Matea approves of the outfit too!  She asked me to modify it a little and turn it into a bathing suit pattern so we'll see how that goes.
Saturday, April 21, 2012

SALE

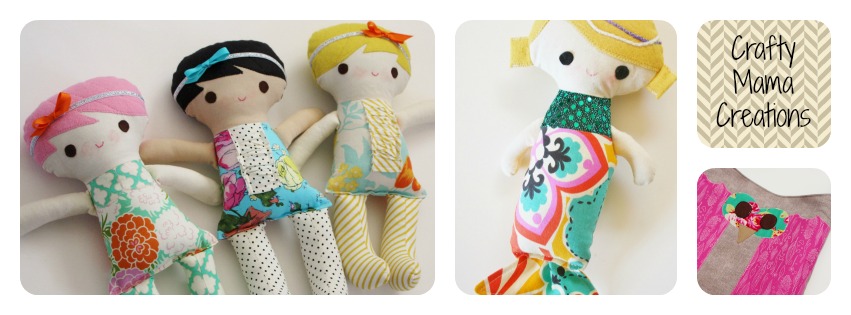
All rag dolls in my shop have been marked down to $20!  
Take a quick peek, there are some real cuties listed.  Shop here.


Thursday, March 15, 2012

Pinterest Inspired Headboard

Wanna know a secret? Crafty Papa and I have never had a real bed. I mean, we have a bed frame but we've never had a bed with a headboard and foot board. In every house we've lived in, our master bedroom sort of looks like we just finished college and have no money. Now only half of that statement is true:)

I pinned this headboard and knew we could make it for almost-free...


The new place we call home has hidden treasures all over the property. We've found an old wood burning stove that we use in the back yard, another wood burning stove that was rotting but Pops used the legs as a base for an outdoor table, a washing machine tub for campfires, old metal fencing I used for a jewelry organizer, vintage pencils and bottles, the cutest vintage metal cart and tons and tons of old wood.

This project couldn't have been easier. We picked out wood planks that were still in decent condition and gave them a good brushing to get rid of debris. Then we gently screwed them onto anchoring strips (and I really do mean gently, the screws just barely go into the wood planks because we didn't want to risk splitting them).

I used my Cricut to cut out the "Mr." and "Mrs." stencils and used paint I had left over from another project. I couldn't adhere the stencil to the wood because it was so rough so I dabbed the paint on instead of brushing.

Our only cost was the hardware to hang it. Not too shabby. It makes a big impact in our bedroom and definitely makes it feel more finished.

Wednesday, February 8, 2012

Quilting


I started a new quilt this week and realized that I never shared the last one I made. In the midst of moving during the holidays, I decided to make my mom a quilt for Christmas. And I even finished it in time for Christmas with a few days to spare!

I used this tutorial from Cluck Cluck Sew and used only fabrics I already had in my stash except for the back. I must have really loved her quilt because I pinned it twice on Pinterest and didn't realize they were the same quilt!

I've always stippled my quilts but decided to do something different this time. I free motion quilted the borders and straight line quilted the blocks. Honestly, I didn't love the straight line quilting. It definitely made for a much less puckered back but I just really like the crinkly look that stippling creates.
Now I'm working on a scrappy log cabin quilt using this tutorial from Red Pepper Quilts.

Of course, I'm piecing the blocks only using fabrics from my overflowing scrap drawers. I've done a lot of rainbow-ish primary colors quilts so this time I'm trying to go with a different color scheme...pink, yellow, green and blue with gray sashing. I'd really like to make a queen size quilt for our bed but that's a whole lotta blocks to piece! But it would look fabulous with my gold chevron curtains, don't you think? (that's the view from my sewing desk in our bedroom...don't hate)